As fall approaches, we find the sun setting hours earlier than it did in the summer. With this increase in darkness, we need to rely on the forward lighting systems in our cars and trucks to keep us safe. In this article, we are going to look at the importance of making sure your headlights are aimed properly. Proper horizontal and vertical adjustments will ensure that you can see far enough down the road to react to obstacles or avoid animals. Of equal importance, aiming your lights so that they aren’t blinding oncoming drivers is crucial to those drivers staying in their lane and not colliding with your vehicle. The science and process are simple, but they’re often overlooked.
Headlights Are an Important Safety System
In addition to your vehicle’s tires and braking system, your headlights are one of the most critical safety systems on your vehicle. If you can’t see far enough down the road when it’s dark, you won’t have time to react to objects in your path. At 60 miles per hour, you and your vehicle are covering 88 feet per second. Given than most humans have a reaction time of about one half of a second, and it takes another half of a second to move your right foot from the gas pedal to the brake, you’ve already traveled 80 feet. Now, consider that the average vehicle requires between 120 and 145 feet to stop from 60 mph, and you’ve likely traveled at least 200 feet.
Most low-beam lighting systems provide useful output to a range of 100 feet. Some of the better HID and LED systems are bright enough to illuminate 150 feet in low-beam mode. Driving at a speed where you don’t have enough time to stop because of your lighting system’s limits is called overdriving your headlights.

How Can You Upgrade Your Lighting System?
Upgrading the lighting on your vehicle involves two factors. First, you need a light source that is bright enough to illuminate the road at a distance that gives you enough time to react safely. Next, your lights need to be aimed perfectly to make use of their output capabilities. If your lights are aimed down at an angle of five degrees, then the area in front of your vehicle might be bright, but you’ll never see more than 100 feet down the road. Conversely, having your lights aimed horizontally might provide good long-distance vision, but this can lead to your lights blinding oncoming drivers. A driver approaching you who cannot see the edges of the road or your vehicle is as dangerous as you not seeing where you are going. Proper headlight aiming is paramount!
When Should I Have My Headlight Aim Checked?
The first sign that your lighting system needs adjustment would be that oncoming drivers are flashing their high beams at you as they approach. Blinding an oncoming driver is extremely dangerous. Likewise, if your lights don’t light up the rear bumper of a vehicle a car’s length in front of you, they need adjustment.
If you have made any modifications to your vehicle, you should have your technician check the headlight alignment. Changes to tire diameter or suspension height, especially if you have installed a leveling kit or lowering springs, require that the lights be adjusted. If you have added weight to your vehicle in the form of a stereo upgrade with a subwoofer system, the additional mass in the rear of the vehicle may also necessitate a change in light aiming.
Let’s Talk About Headlight Aiming Angle
The farther your lights are above the road, the steeper they can be angled downwards while still allowing you to see approximately 150 feet in front of the vehicle. Many websites cite a specific angle that is deemed to be suitable for all applications. The reality is, the specific downward angle of the beam depends on their distance above the ground. If someone says two degrees is the right angle, but your lights are 18 inches off the ground, you’ll only have light for 43 feet in front of your car. If you have a truck with the lights 36 inches above the ground and set the lights to the same angle, you’ll have light for 86 feet. Likewise, the suggestion that a fixed amount of drop is suitable also fails to compensate for differences in bulb height off the ground.
Have Your Headlights Adjusted for Maximum Safety
When it’s time to have your headlights adjusted, we’ve developed a simple process that makes the adjustment reliable and efficient. Before the technician begins any work, your vehicle must be on level ground with the tires inflated properly. Ideally, whatever combination of driver and passenger(s) is most common to the vehicle’s operation should be inside. Likewise, the fuel tank should be half full. If you have a truck or SUV and carry tools or supplies, have them in the vehicle. You’ll want the ride height to be typical before the measurements begin.
Step 1 – Measure the Cut-off Height
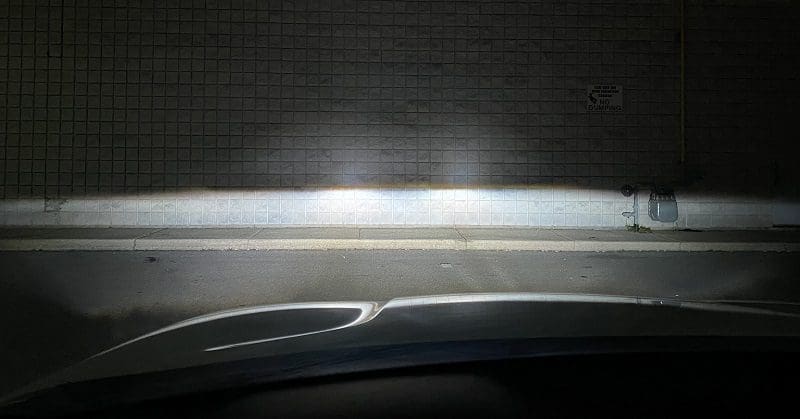
The first step is to establish the level at which the light is produced at the bulb or lens. With the vehicle appropriately loaded (as outlined above), measure from the ground to the top of the light cut-off pattern as close as possible to the headlight lens. Note this measurement for each side of the vehicle, as it may not sit perfectly parallel to the ground.
This process requires that the lights are already aimed relatively accurately. If you’ve had new projectors or bulbs installed, your tech will need to make sure the light pattern is relatively close to accurate. If a light is pointing at the sky, the remainder of the measurements will be inaccurate. They should be within a few degrees of horizontal.
Step 2 – Measure the Cut-off at 25 feet
The next step is to measure the height of that headlight cut-off at a distance of 25 feet in front of the lights. Use the same reference point used for the first measurement to set this distance. For example, if the tech measured the at-vehicle height 4 inches in front of the headlight lens, he or she should measure out 24 feet and 4 inches for this second measurement.
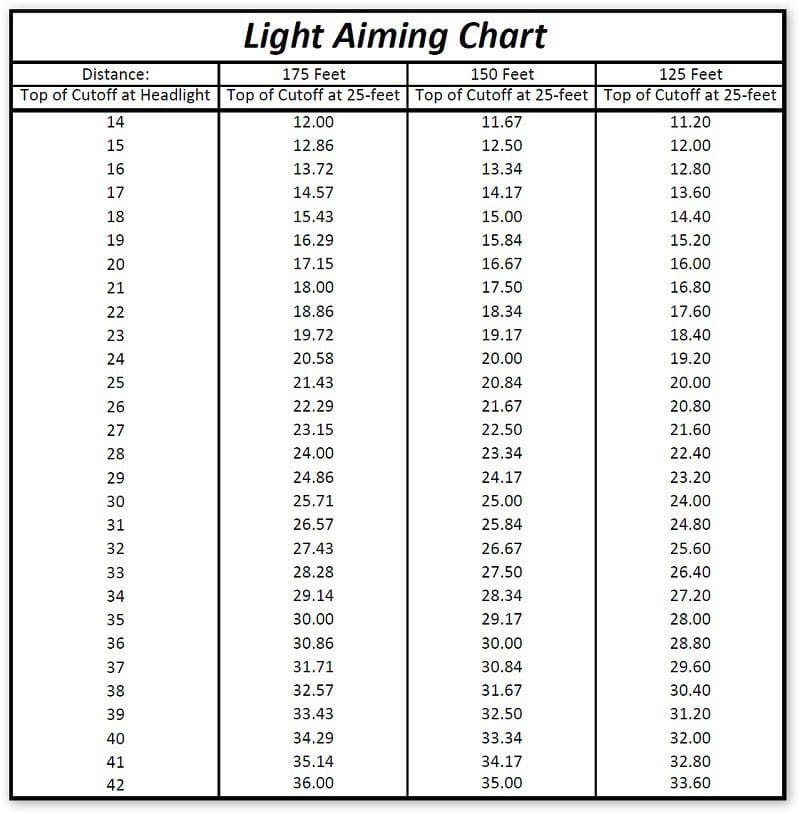
Step 3 – Use the Chart
Using the chart below, your technician can determine how high the cut-off should be above the ground for the distance you want to illuminate. If you drive exclusively in the city, then the 125-foot distance will work well. If you drive in the country, the extra distance afforded by using the 175-foot measurement is a better choice.
Step 4 – Adjust the Lights
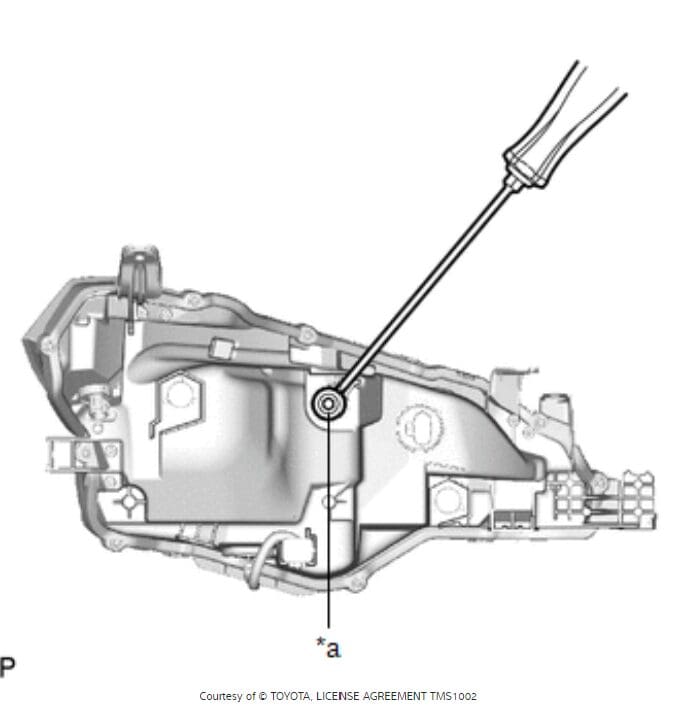
Most modern vehicles have simple adjustments for vertical and horizontal alignment built into the light assembly. In most cases, a long screwdriver is all that’s required to raise or lower the light aiming to achieve the correct cut-off height.
The next step is for the technician to adjust the lights so that the drop at the 25-foot mark matches the chart. As long as both lights are close to each other in height, your technician can fine-tune the adjustment by lowering whichever light is higher so that the top of the cut-off is in line with the output pattern of the other light.
Horizontal Headlight Adjustment
If work has been done to the vehicle or the light assemblies, then your tech may need to adjust the horizontal adjustment to make sure both lights are aimed forward and that the hot spots from each light are spaced apart by the same distance as the bulbs in the vehicle. It’s crucial to make sure the lights are pointed straight ahead and not off to the left or right.
Drive Safely with Proper Lighting
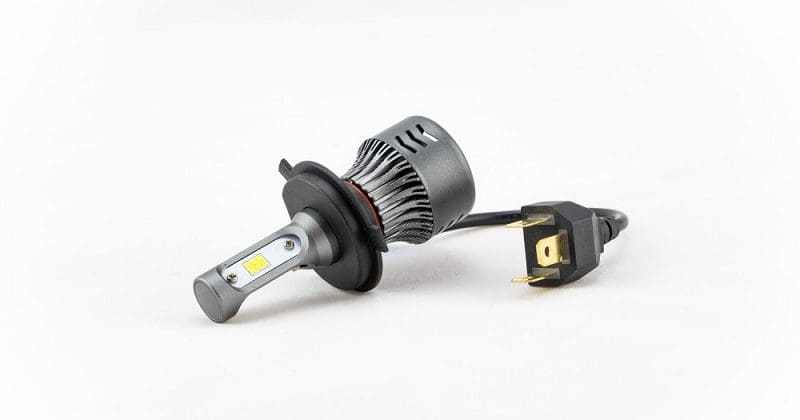
There are a multitude of options to upgrade the lights in your car or truck. High-performance halogen, LED and HID bulbs can improve the capabilities of mediocre factory lighting systems. Once you’ve had these light upgrades aimed properly, you’ll be able to see farther and drive more safely. Your local specialty mobile enhancement retailer can likely help you with a complete lighting solution that includes proper pattern alignment.
