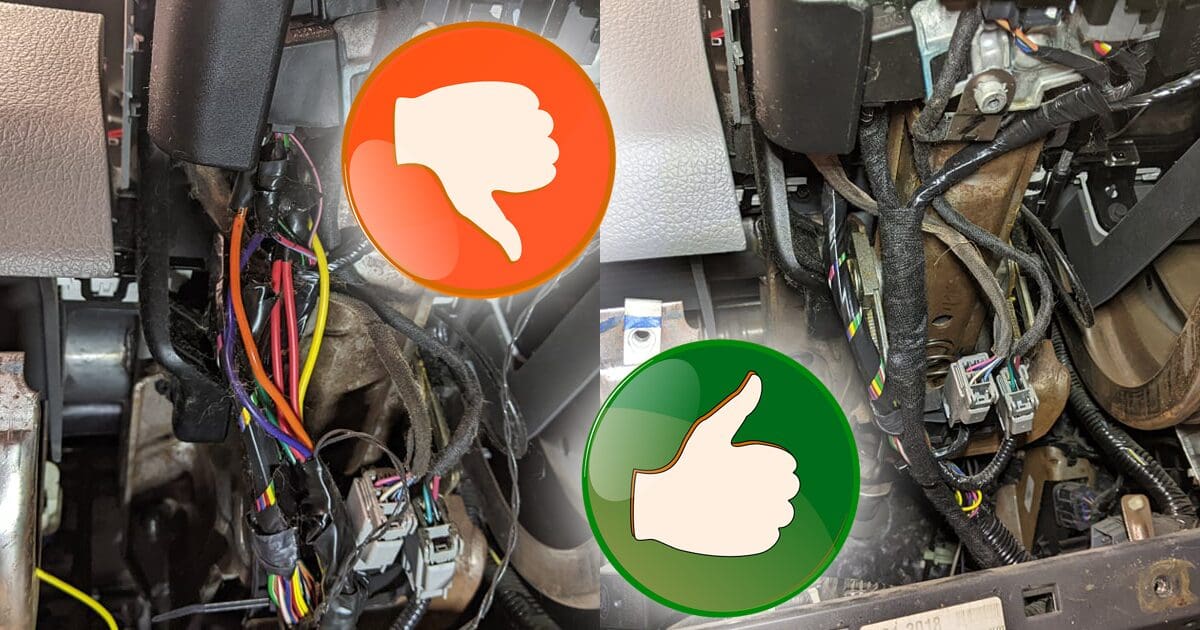
In the car audio industry, we use the term rescue to describe the removal, wiring repair and reinstallation of an audio, lighting or remote starter system that wasn’t integrated properly. In many cases, these systems don’t work or have negatively affected the vehicle’s reliability and left the owner stranded. Our friend Cory Vaillancourt from DC Car Audio in Sarnia, Ontario, recently shared some before and after pictures of a remote car starter system rescue he performed for a local client.
We’re sharing this information so you’ll know what to look for when shopping for the best retailer to work on your vehicle. Also, if you see the “before” when inspecting their work, you’ll know to continue your search.
The Original Installation
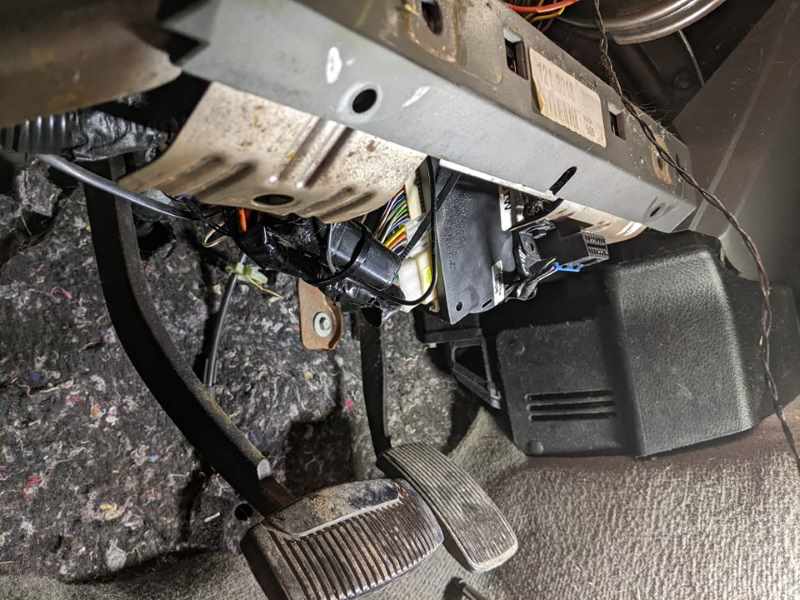
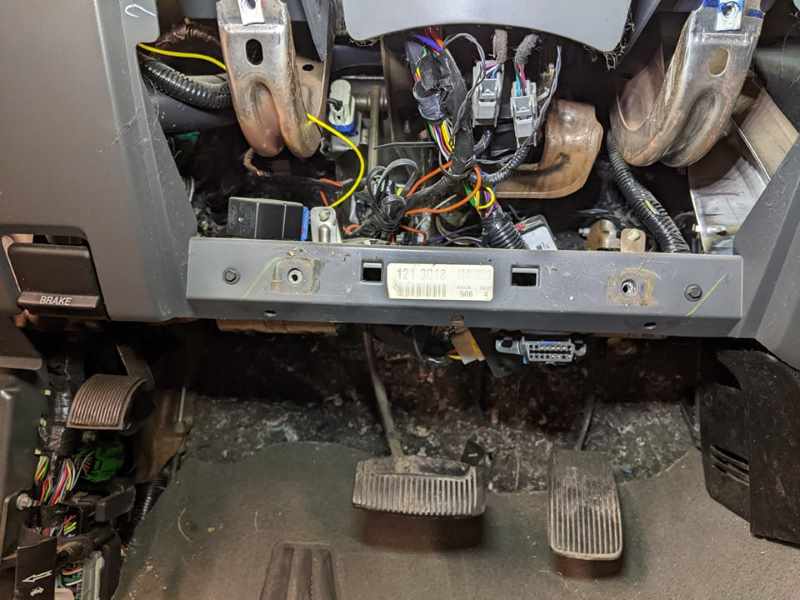
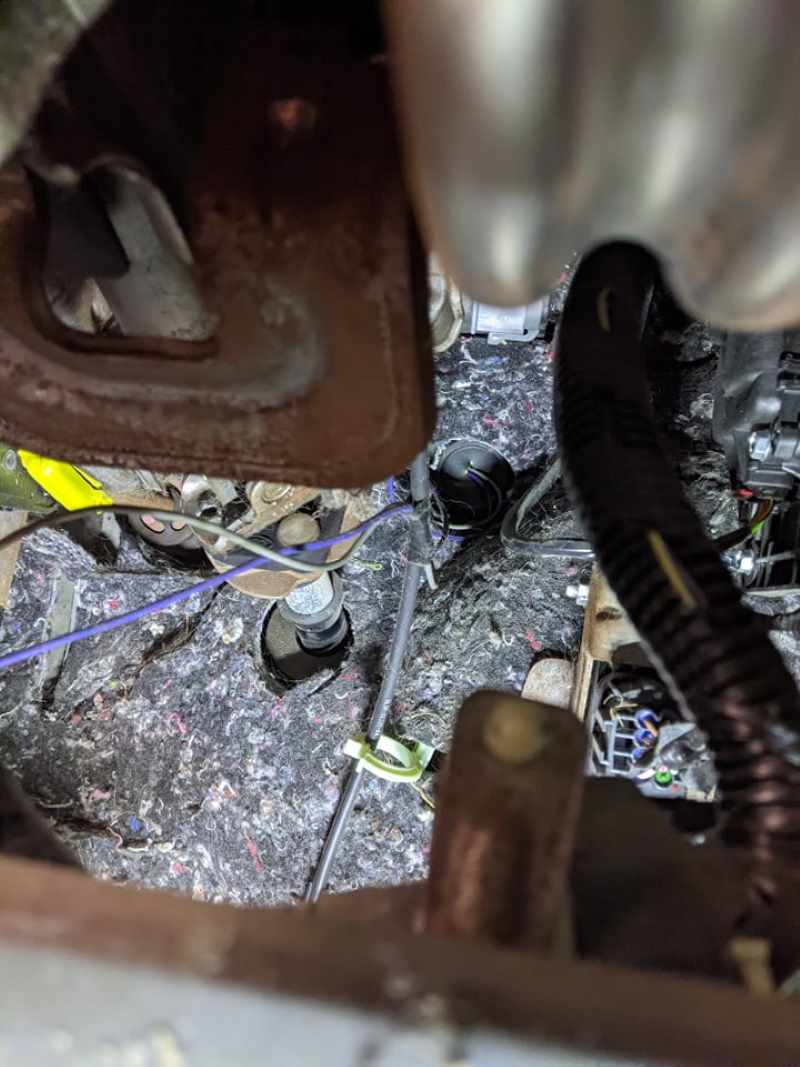
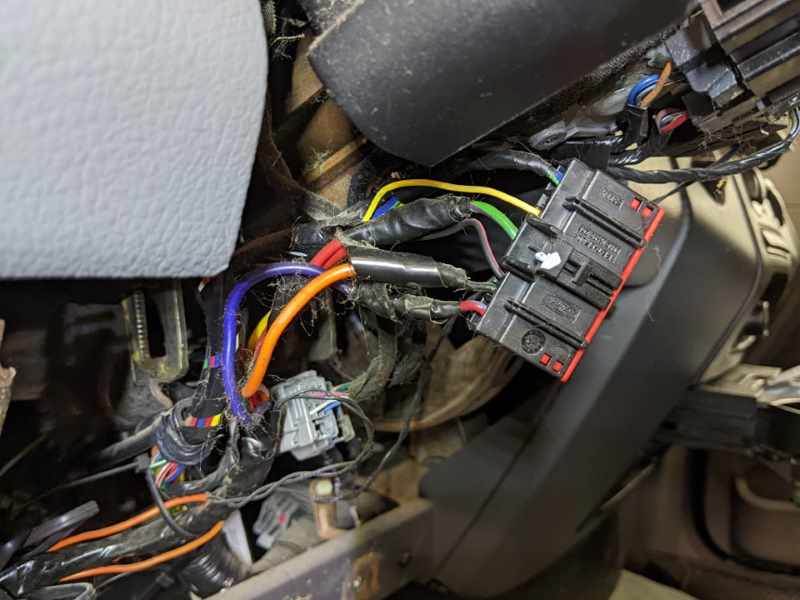
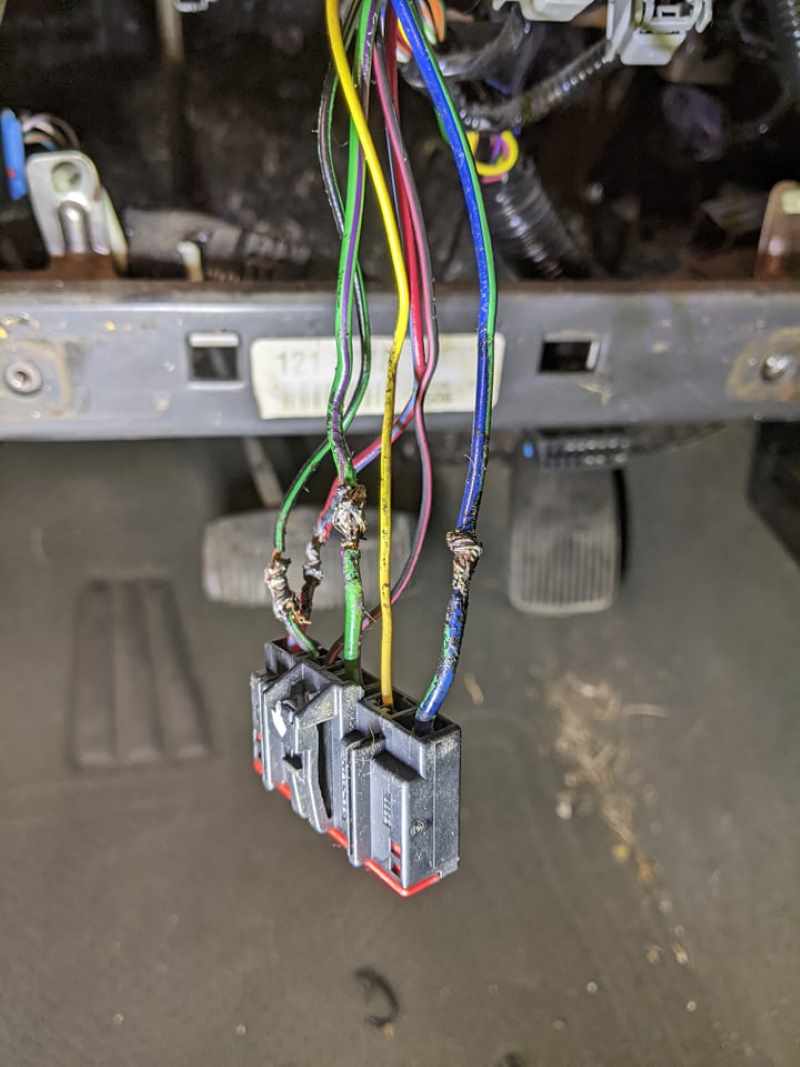
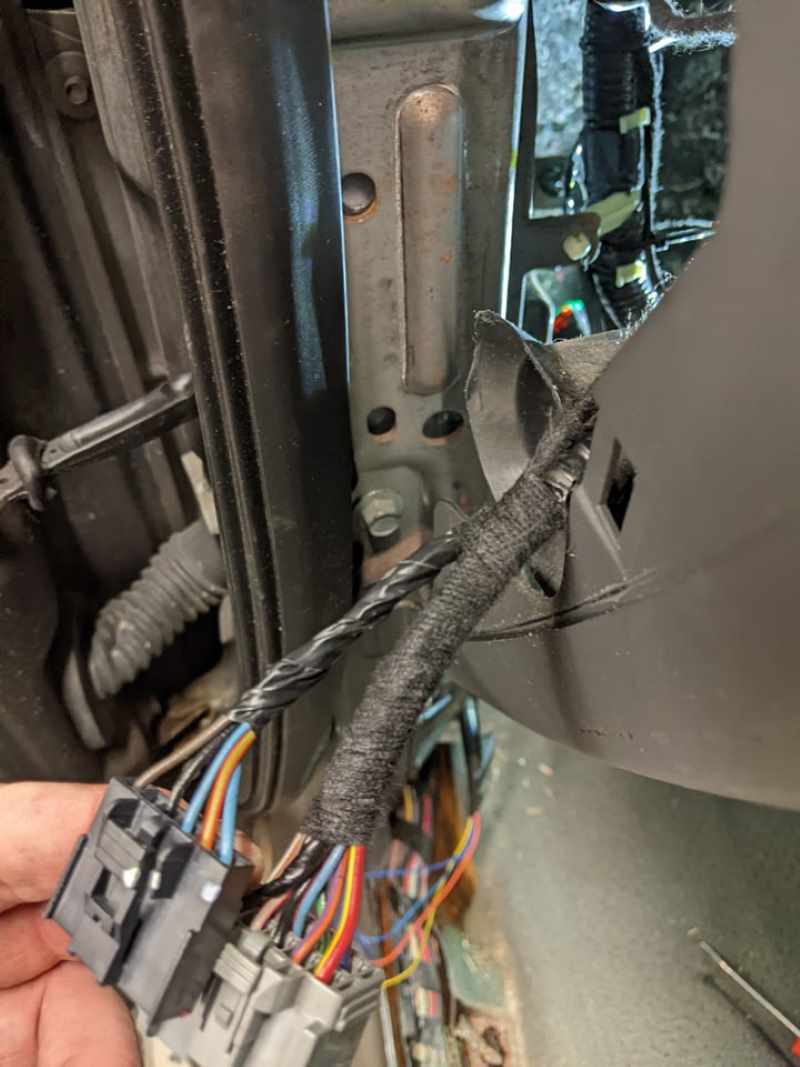
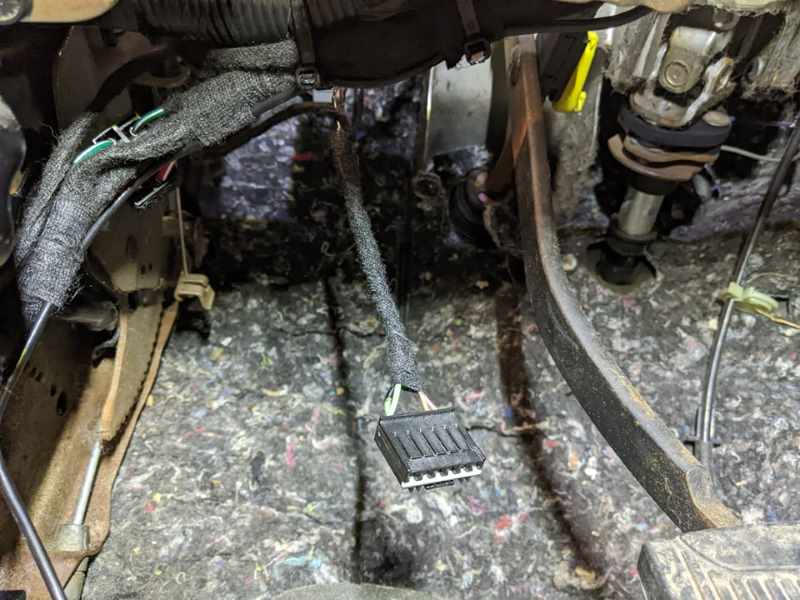
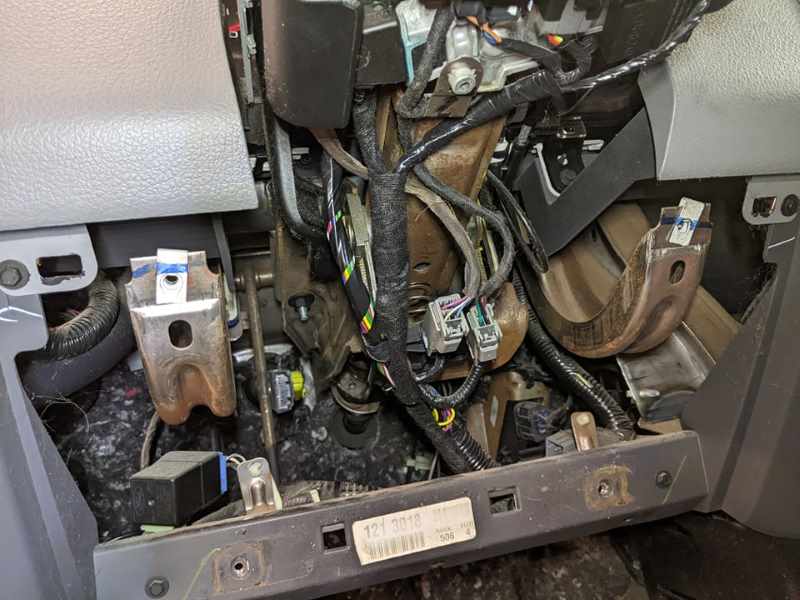
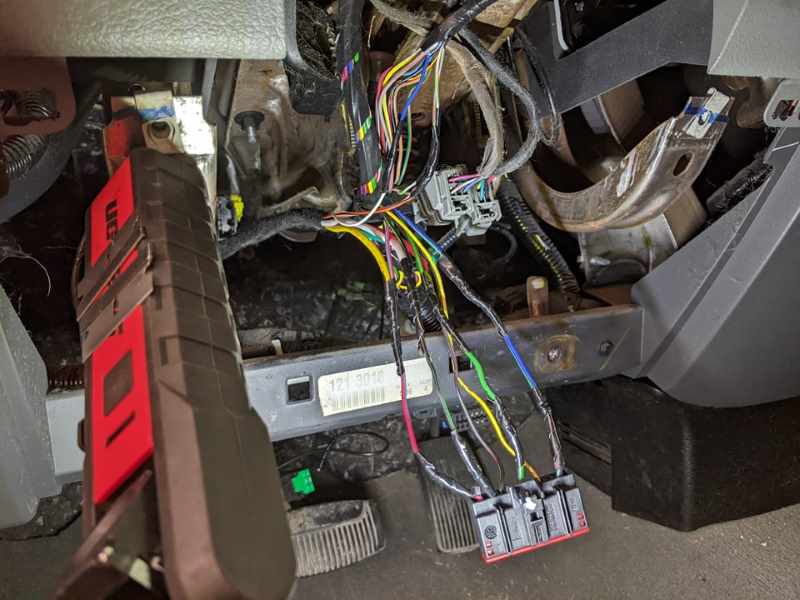
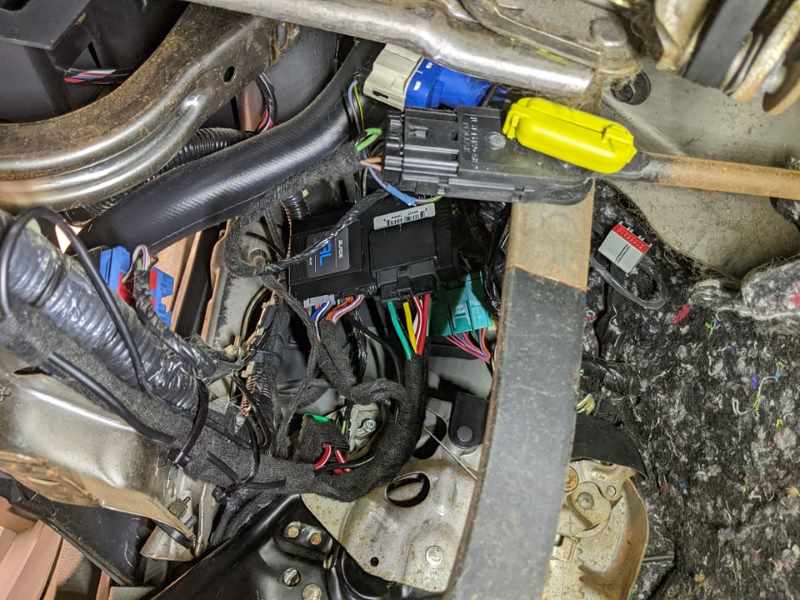
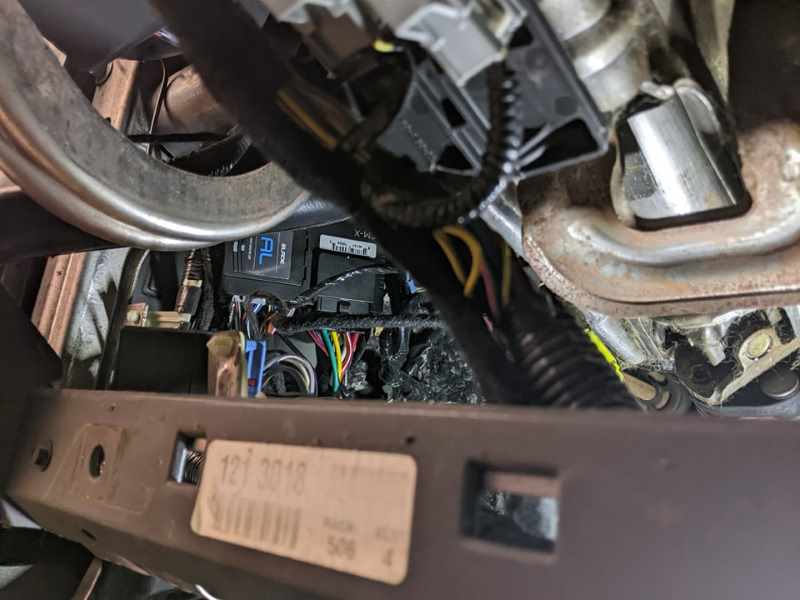
We’ll start with the basics. When Cory inspected the vehicle, he first saw an improperly mounted remote starter control module, or as we often call it, a brain. The module was visible under the dash at the brake and gas pedals. After he removed the trim panel under the steering wheel, it became evident that the installation hadn’t been neatly executed and that the wiring hadn’t been organized. The yellow and orange wire loops visible in the second picture should have been trimmed to length, bundled into a tidy harness and protected from rubbing on the sharp edges of the dash support structure.
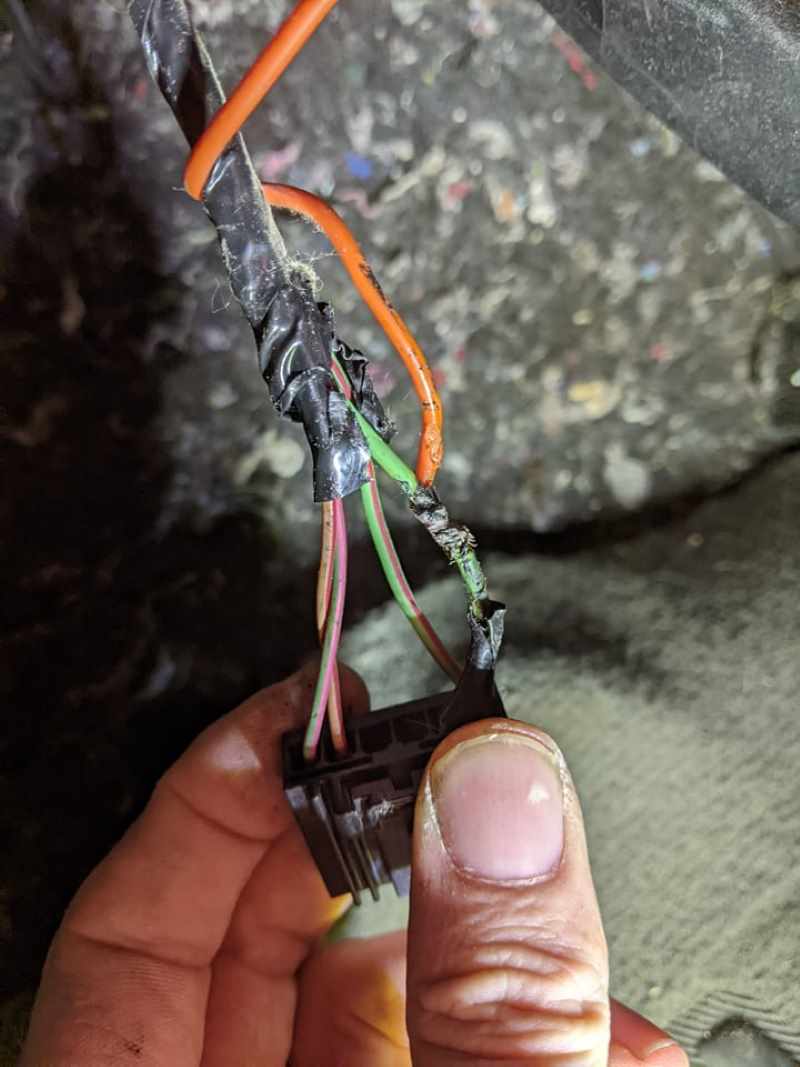
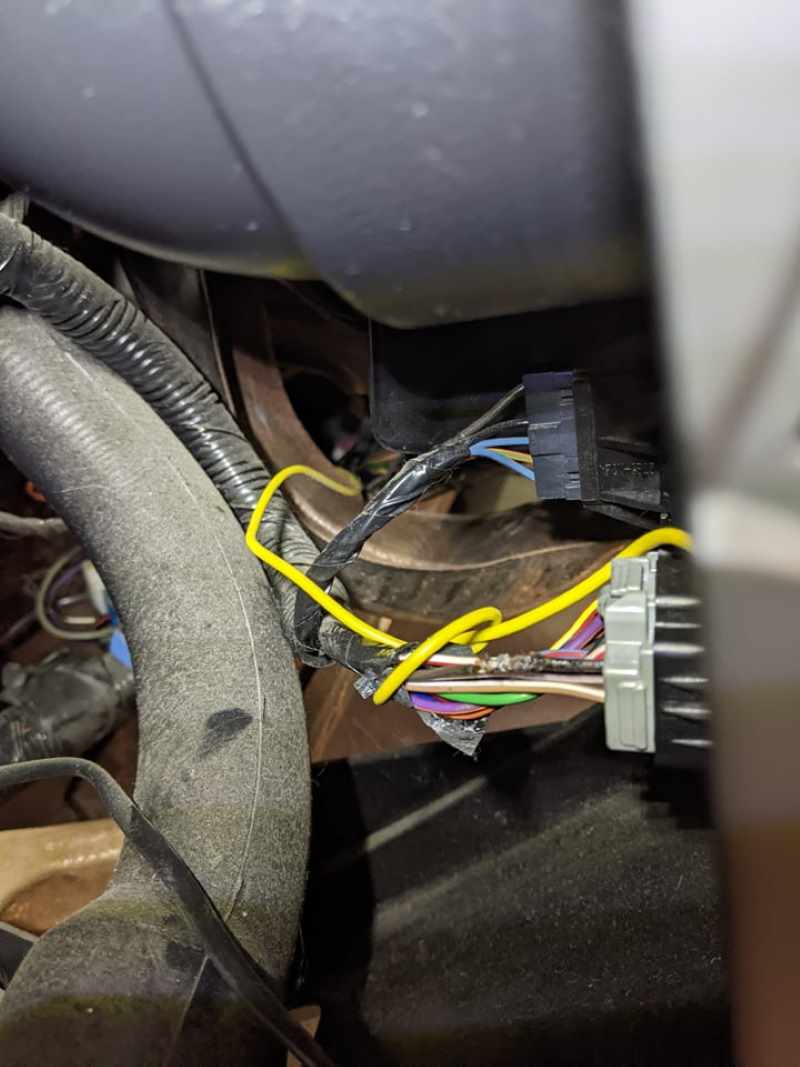
As Cory started to remove the old starter from the vehicle, more issues became evident. The wire to the parking brake switch was soldered poorly, but more significantly, the electrical connection wasn’t protected in any way. It may have been wrapped in tape at some point, but it was completely exposed when he disconnected it.
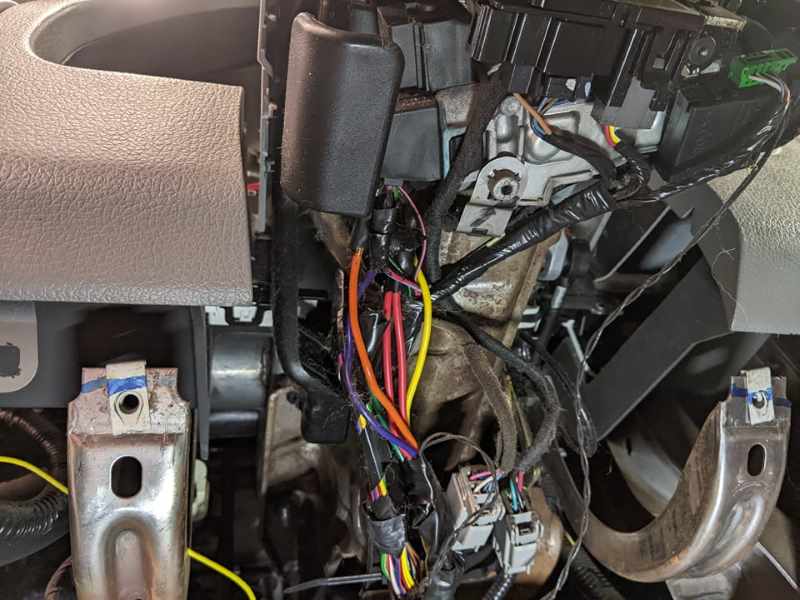
The wires headed to the engine compartment for engine tachometer sensing weren’t bundled or protected.
Where connections had been protected, the electrical tape had started to unravel and fall off. If these wires had shorted, the client might have been left stranded, or the starter motor might have run continuously and damaged itself or the engine flywheel. Both would have resulted in significant repair costs.
The high-current red, yellow, orange and violet wires running to the ignition switch weren’t bundled neatly or protected. Quite simply, this is sloppy workmanship.
Wrapping wires around harnesses is not the proper way to secure them. Instead, they should be wrapped into a bundle and secured with a high-quality cloth or electrical tape or zip-tied in place every few inches.
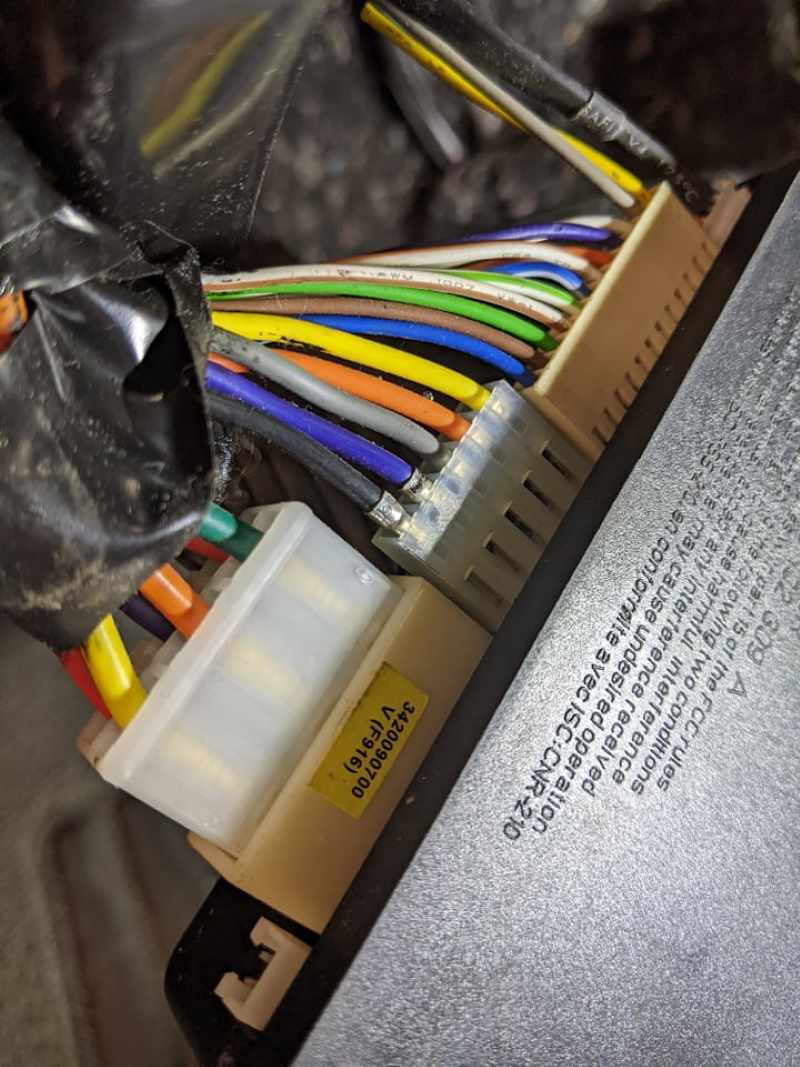
After disconnecting all the wiring and removing the control module, Cory found what likely had been causing the vehicle’s functionality problems: The brain hadn’t been secured properly, and two of the wires had pulled out of their harness on the side of the module.
Cody mentioned that he doesn’t connect to the factory wiring right beside connectors. Instead, he leaves 4 to 6 inches of wire so that everything remains serviceable. This process does require the removal of factory-installed looming, which adds a few minutes to the project. However, it helps to ensure that no additional stress is applied to the connector.
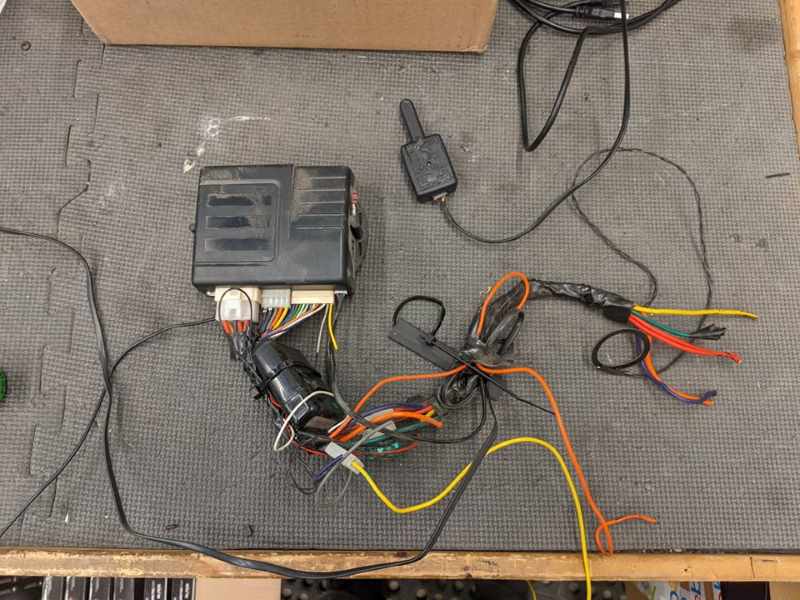
The old remote starter system is out of the vehicle and on the workbench. Aside from the antenna lead, there’s no excuse for wires not to be cut to length and bundled neatly.
Installing a Compustar Remote Car Starter
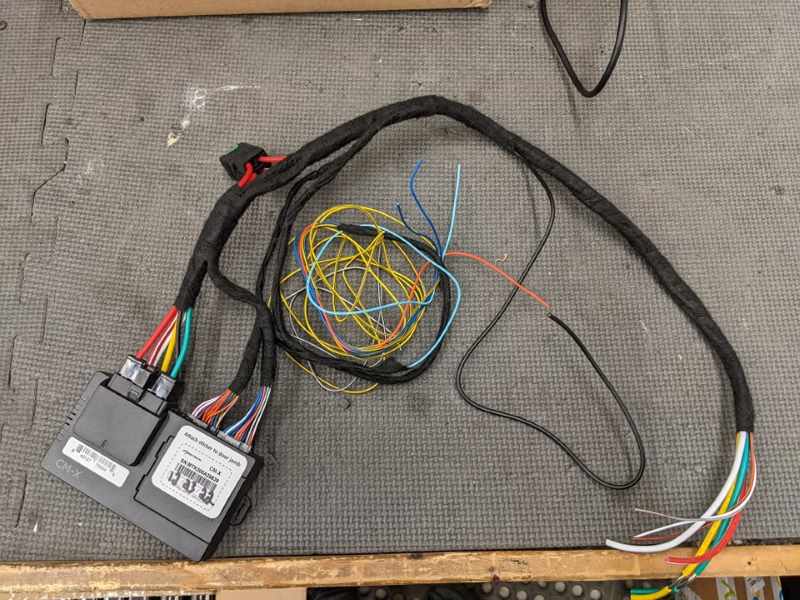
Cody starts every project by gathering information about the vehicle and preparing the wire harness from the control module. Then he wraps all the wires with automotive-grade cloth tape to keep everything tidy and prevent buzzes and rattles as the vehicle is in operation. In this instance, he’s using one of the brand-new Compustar CM-X control modules. The blue, yellow and orange wires will be cut to length in the vehicle, then connected, protected, bundled and secured.
Here are two examples of how wires should be connected, secured and protected during a remote starter installation.
The main wiring to the ignition switch was connected to the factory wiring and wrapped in high-quality 3M vinyl electrical tape. The harness from the Compustar control module was secured to the vehicle harness using zip ties to ensure that it wouldn’t move or come loose.
As mentioned, Cory makes his connections a few inches away from connectors. Here are the high-current wiring connections he made. He wrapped the original solder connections in fresh tape to protect them. This entire harness will be wrapped in cloth tape before being plugged back into the starter switch.
Cory told us he always mounts components in the same locations in the vehicles he works on. So if a client wants to upgrade the system in the future, Cory knows exactly where to look, saving him time. The brain is high in the dash and secured with easily accessible zip ties. The harnessing to and from the brain is also secured with zip ties.
Remote Starter Programming Options
Cory and retailers of his caliber employ a few tricks to ensure that their clients have the best experience possible with their remote car starters. One of these tricks is called RAP shutdown. RAP stands for Retained Accessory Power. The RAP feature keeps your radio playing when you stop the car and turn off the key. The radio shuts off when you open the door.
If you’ve had a remote car starter installed in a vehicle with the RAP feature, the radio will continue to play for as long as 15 minutes (vehicle dependent) after the remote starter is shut down or times out. This puts an additional unwanted draw on the electrical system. The last thing a car battery needs in the winter is an extra load on it.
Choose an Expert to Install Your Remote Car Starter
The photos of how Cory installed this Compustar starter are a typical example of how he serves each of his clients. This type of attention to detail and workmanship is why I drove three hours to have him upgrade the car starter in my personal vehicle. I’ll happily pay to have everything done perfectly.
If you’re shopping for a remote car starter for your car or truck, keep in mind that you should be shopping for the best installation, not the best price. The last thing you want are headaches or reliability problems from a rushed or low-quality installation.
