![]()
Some of us here at BestCarAudio.com watch a lot of YouTube. While it’s usually Cleetus McFarland, Big Clive, CJ Race Cars, AvE, Abom79, or Cutting Edge Engineering for the editorial staff, those Shorts occasionally catch our attention. One such video was from the guys at DipYourCar.com. They were blacking out the badges on a Toyota SUV. This got us thinking: How easy is this? Can someone with no painting experience succesfully pull off a badge blackout project at home? Will it look the way we want? As they say, there’s only one way to find out for sure!
The Badge Blackout Project
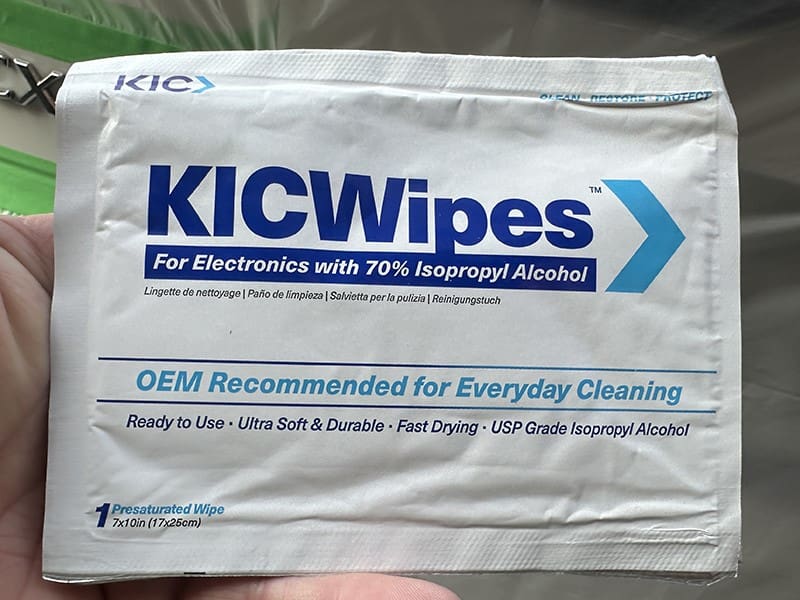
We started by ordering two cans of the Piano Black HyperDip from DipYourCar.com. We’ve used PlastiDip on other projects, but the finish was too matte. We figured one can was enough, but if things went well, maybe we’d do some of the badges on other vehicles. The order arrived promptly from their Florida-based warehouse, and they included two KICWipes packages to use as final preparation before we started spraying.
We watched their YouTube video on spraying the badges on the Toyota 4Runner and the Mazda CX-5. Both videos are excellent and cover everything you need to know to do a good job.
Vehicle Preparation
One luxury we have when undertaking a project is spending as long as we want in the planning stage. This differs dramatically from what installers and technicians experience when upgrading or enhancing a vehicle. If we spend a week or month researching, planning, and revising our process before we start, we can—and nobody cares.
We spent about four hours researching and devising our plan for this badge blackout project. That included a run to the local dollar store for a roll of masking tape and some plastic drop sheets. In the “good old days,” we had newspapers for masking. It seems those days are gone, and the flyers we get aren’t enough to cover the surface area we wanted. Print is dead, and almost everything is digital.
Logo Masking
Per the instructions, the vehicle was reasonably clean and had not been washed or rained on for several days. The goal is to ensure no water is trapped in or around the adhesive that holds the emblems to the body. We wiped down the area around where we would be working with a microfiber cloth and some Dupli-Color Grease and Wax Remover. Once satisfied that the area was clean and dust-free, we masked around each emblem, leaving about a half-inch of space to the edge of the tape.
Our first observation is that buying no-name masking tape wastes time. The adhesive isn’t really strong enough to stick to the vehicle or the tape itself. We’ll get by with it after applying pressure to the tape with a fingernail. With that said, buy the real 3M Scotch or FrogTape.
Overspray Protection
We are very pleased with the uber-inexpensive plastic drop sheets from the dollar store. We cut them down and covered everything on the back of the vehicle.
Despite our planning, the next step is questionable. We used a sharp knife to cut out the plastic around the badges. Cutting through the tape and damaging the vehicle would be so easy. You can achieve the same results by holding a piece of cardboard behind the plastic and cutting against that.
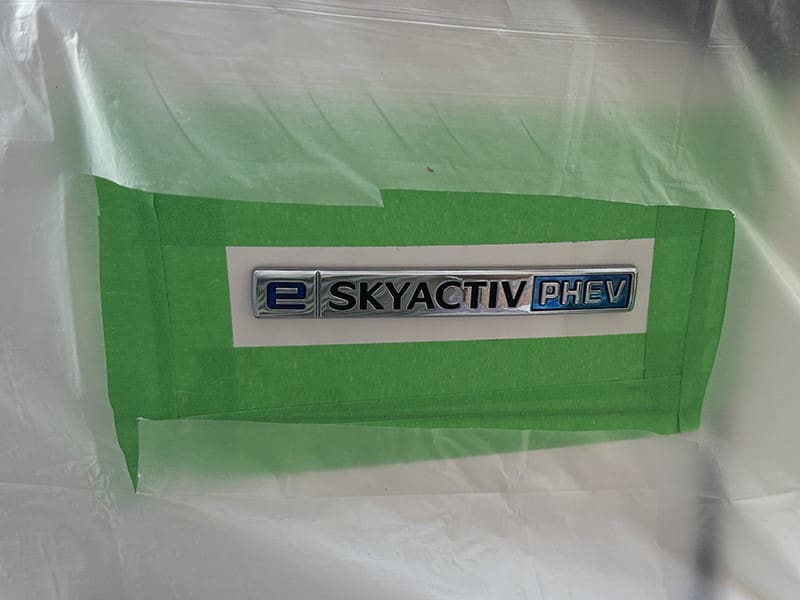
Afterward, tape the plastic down. However you choose to trim the masking material, the next step is to tape it down to the body to ensure no overspray gets under it.
Now, it’s time to take the cleaning of the emblems to the next level. We broke out the cotton swabs and went over every millimeter of the badges to make sure nothing was left on them that might prevent the HyperDip from sticking.
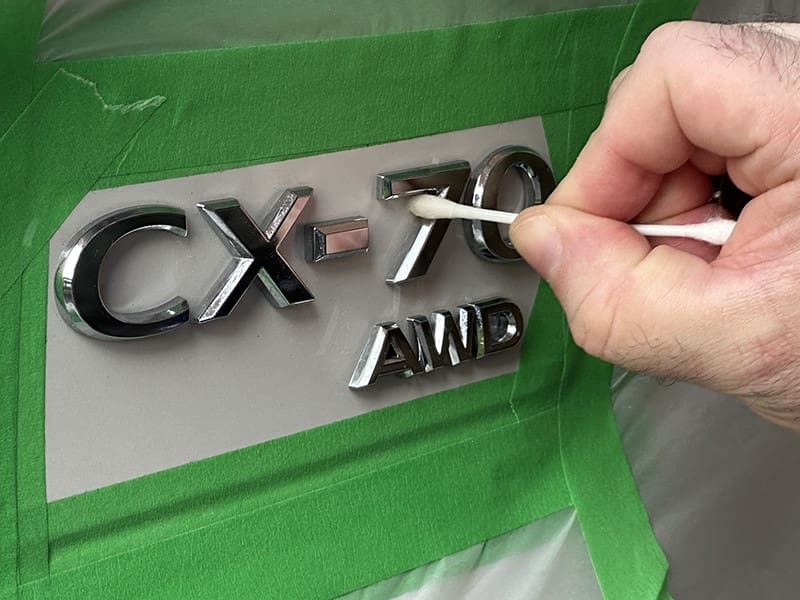
Even after a pre-cleaning with grease and wax remover, a detailed cleaning of every crack and crevice with the cotton swab, and a final wipe with a cleaner-soaked paper towel, there was still dust and residue on the badges. The alcohol wipes did an excellent job of getting rid of this.
Dust and Finish Coats
With everything prepared, it’s time to return to the instruction card for the next step. DYC suggests applying at least two very light dust coats. These are crucial to ensuring the rubberized coating will adhere properly, as they explain.

The instructions specify that you should wait at least five minutes between coats. When we did this, it was pretty warm out, but we set a timer and waited patiently before applying the second layer.
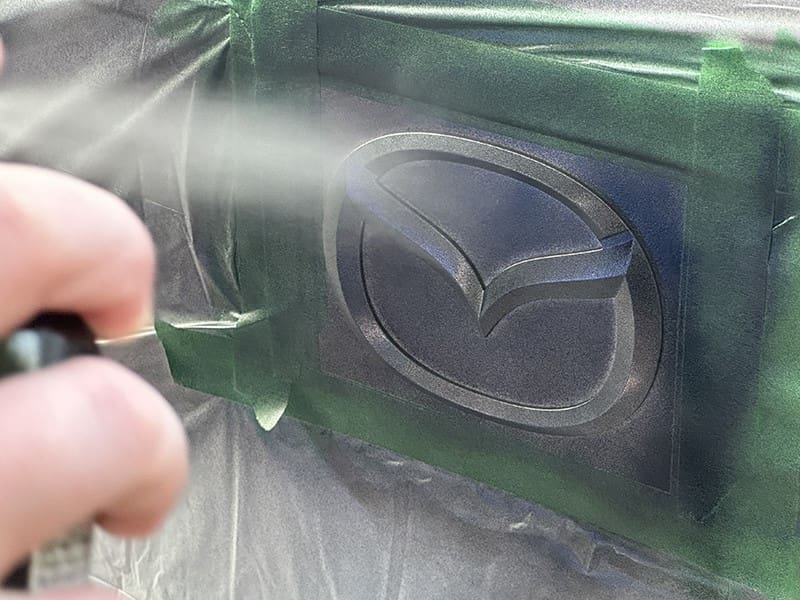
After another five minutes, it was time to lay down the first of many layers of HyperDip. They suggest five or six, but we went with seven in hopes of adding some durability to the coating. Who reads instructions, anyway?
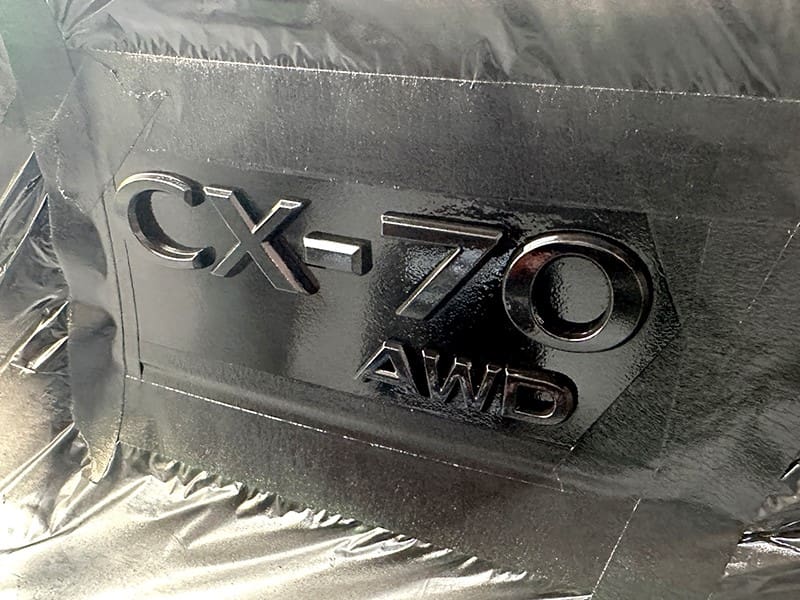
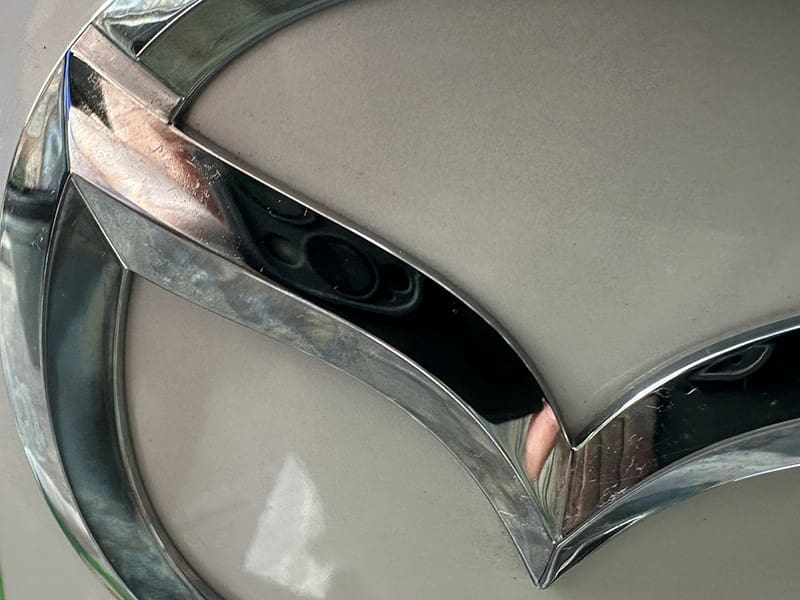
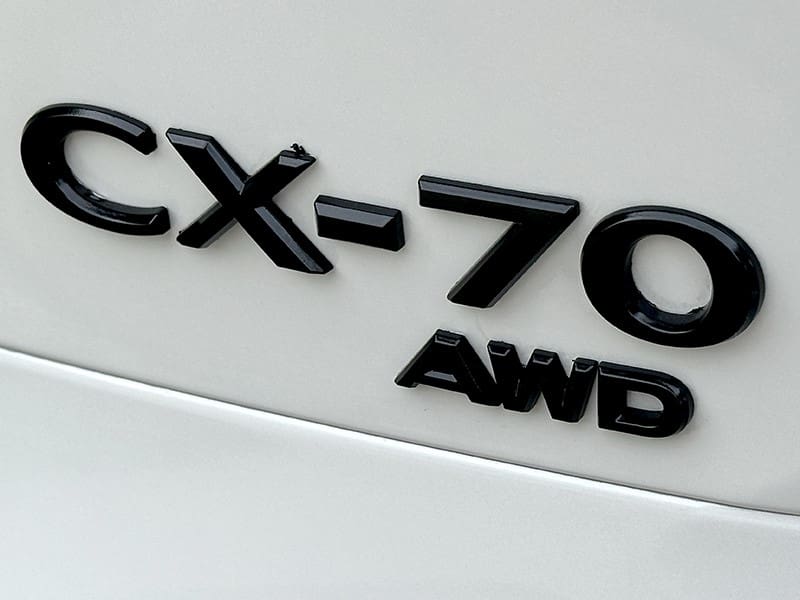
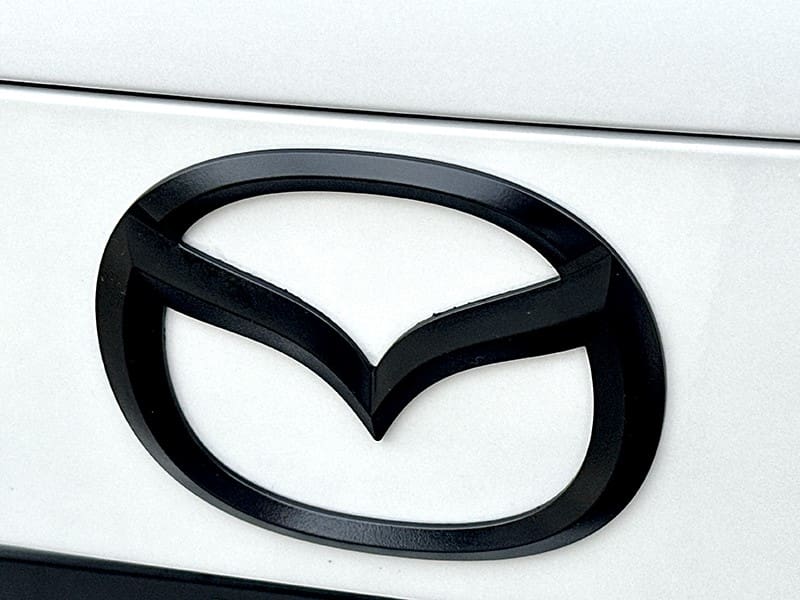
We were content with the finish on the CX-70 and SkyActive badges but felt the Mazda emblem had a more matte finish than we’d hoped. We’ll get back to why we think this happened at the end.
Badge Blackout Masking Material Removal
We need to back up and explain HyperDip and PlastiDip. These are aerosol rubberized coatings. In the everyday use of the term, this is not paint. We should have mentioned this earlier, as it explains the masking procedure and why there is a gap around the badges.
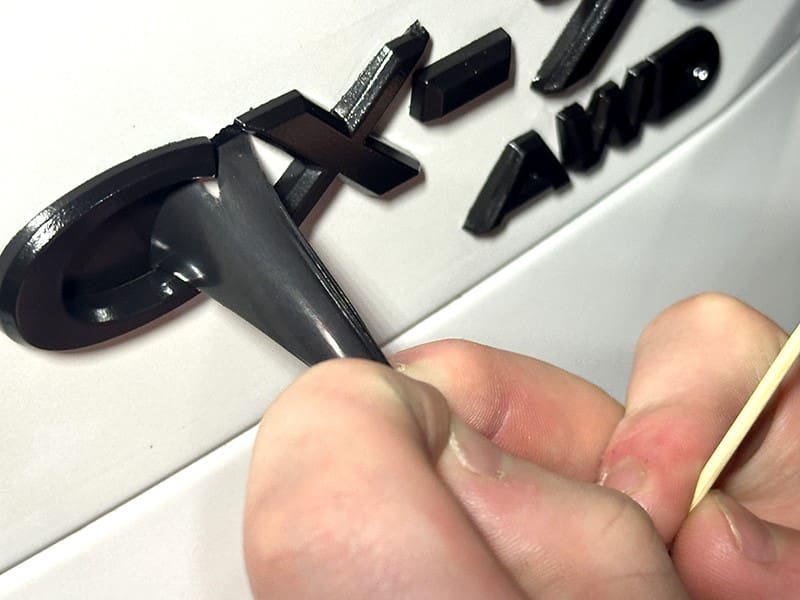
Once the coating has dried, it’s time to remove the masking material. This is a two-hand, preferably two-person job. When you peel up the masking tape, it also lifts the HyperDip, which is the intent. However, we weren’t quite ready to peel it away from around the badges yet. No worries; this just sped up the process.
The way they are installed is the key to removing the coating around the badges. In most cases, there is a two-sided adhesive pad on the back of the badge. This adhesive spaces them away from the vehicle’s body by around 1/32”. That’s enough to form a natural breaking point for the coating. When removing the coating, you must pull it perpendicular to the edge of the emblem.
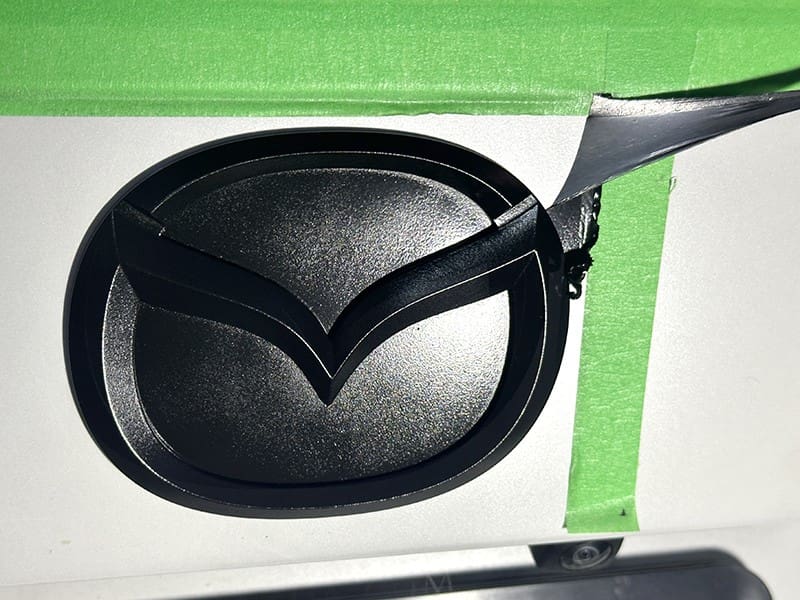
You will need something to pull the coating off between the letters. We used a wooden toothpick, but we strongly recommend investing in a pair of plastic tweezers. You might be able to find these at a local hobby shop.
The Results
Doing the three emblems on this Mazda SUV took about three hours. So, how did it turn out? From a few feet away, the results are promising. We were hoping for a much glossier finish. Why did it turn out somewhat matte? We are 99% sure it’s due to humidity. We’d watched the weather forecast for several weeks, waiting for a low-humidity day. DipYourCar suggests that 50% humidity is the maximum. It was right around that when we started. However, later in the afternoon, we think it went up. If you are shooting for a glossy finish, wait until the humidity is low or find an air-conditioned workplace.
Another top tip that applies to any aerosol used in warm weather conditions is that warmth can cause the paint in the spray tip to dry. This happened to us. Luckily, we had the second can to save us. Put the lid back on the can while waiting between coats.
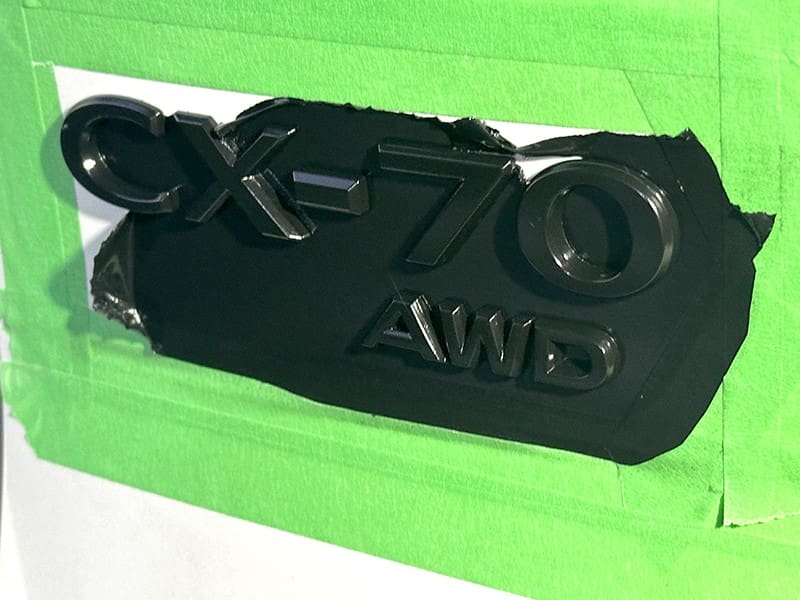
We are picky about how things are executed. We want everything to be the best it can be, so Best is our name. So, are we happy with the results? Not really. The decision to do an extra coat bit us when removing the coating from the edges. There is some extra coating in the middle of the Mazda emblem and some strands on the top of the X.
DIY Badge Blackout Project
Would we call this a failure? Absolutely not. If you want a simple project to do at home for fun and are content with “doesn’t look factory” results, go for it. However, we have a plan B. We think the emblems really should be gloss black. We’ll remove the coating and badges and have them painted black at a body shop. Yep, it will cost more. However, the results will be perfect. Our determination of “perfect” is just that. The results need to look absolutely perfect. This isn’t that.
If you want the badges or emblems on your vehicle changed in any way, visit a local automotive restyling center. They will have the right training and materials to ensure the project looks like the vehicle rolled off the assembly line exactly how you want it.
