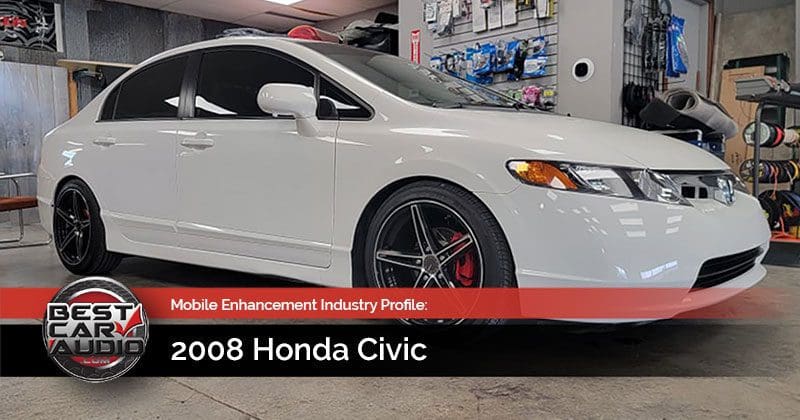
Those of us who were teenagers in the ’80s and ’90s have fond memories of the car audio brands that helped shape the industry. For Tim Cooper, his brand of choice was Rockford Fosgate. Tim had a vision for a custom audio installation in his 2008 Honda Civic and set out to find a shop to create what he had in mind. After visiting many stores, he finally walked into The Audio Shop in Fayetteville, Arkansas, and met with owner Fred Lockett. Fred clearly understood Tim’s vision for the Civic, and the two hashed out a plan to create a one-of-a-kind installation that would look and sound amazing.
Start With a Plan
Tim had done his research and had some design ideas that would steer Fred’s product suggestions and installation plan. Tim’s list was extensive, but rather than coming across as a pipe dream, it showed he was focused on an outcome that would meet his specifications precisely. Fred took notes, made sketches and worked through the process methodically to ensure that the audio gear had an appropriate level of supporting equipment so that everything would sound great and function reliably.
Step One: Wiring and Sound Deadening
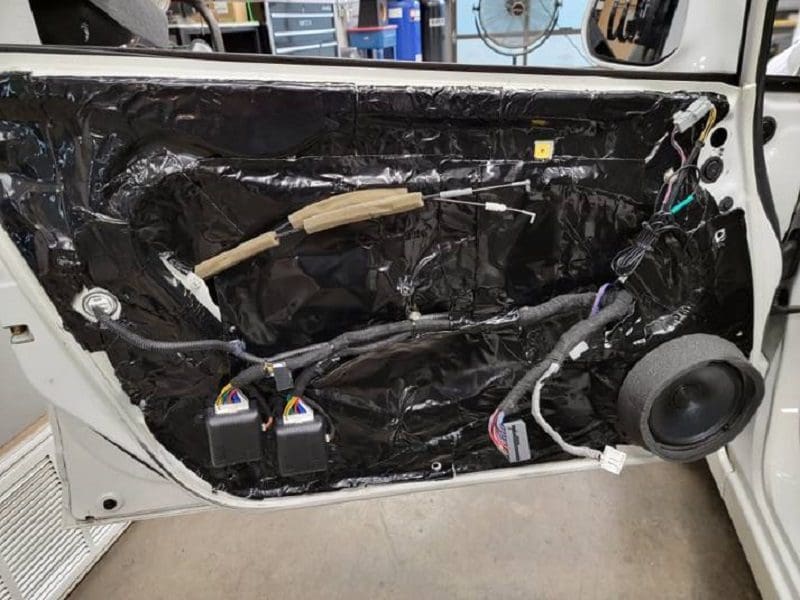
The project started with the seats, carpet and interior trim panels being removed to allow for the installation of Rockford Fosgate Deadskin sound damping material. Almost every square inch of the car was covered, and flexible areas like the metal outer door skins wear two layers for improved energy absorption.
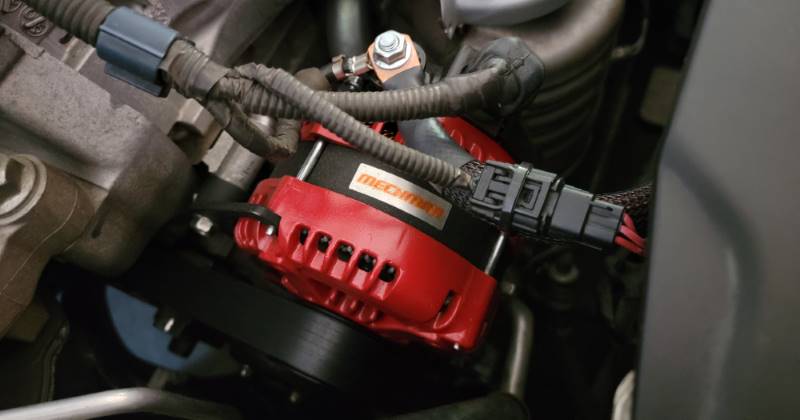
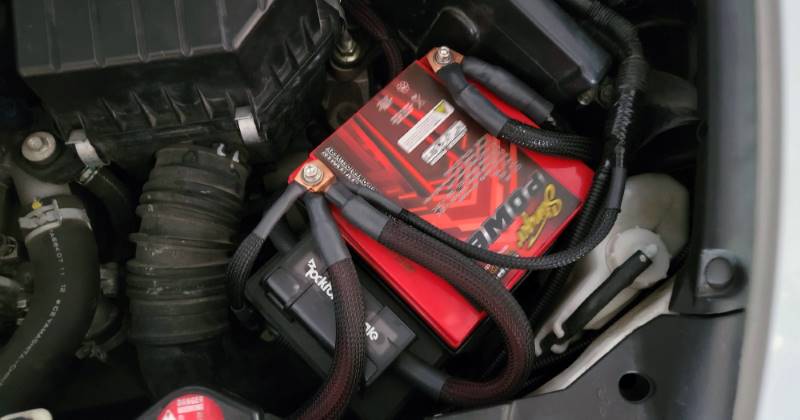
Rockford Fosgate power and speaker wire and Stinger X2-Series interconnects handle getting signals and power where they need to go. As you can see, all the power wiring is protected with a braided nylon loom and terminated with heat-shrink tubing around the copper ring terminals. While working on the electrical system, the stock alternator was replaced with a 170-amp unit from Mechman. In addition, the alternator’s case was painted red for a little extra style in the engine compartment.
The stock battery under the hood was replaced with a Stinger Power Series SPP950 dry-cell AGM unit. Two more of these batteries reside in the rear of the vehicle, along with a 10-farad Rockford Fosgate hybrid stiffening capacitor to ensure that the amplifiers will always have the current they need to produce clean power.
Step Two: Convenience and Protection
Wisely, Tim chose a Compustar remote car starter with an integrated security system to protect the Civic. The system includes a Compustar DAS motion, shock and digital tilt sensor to guard against damage and vandalism. The technicians at The Audio Shop also added power window control modules so Tim can roll the windows up and down from the remote fob. The icing on the cake for the security and convenience system was the addition of a DroneMobile telematics interface. Tim can monitor and control the vehicle from anywhere on the planet as long as his smartphone has access to the internet.
Step Three: Speaker Upgrade
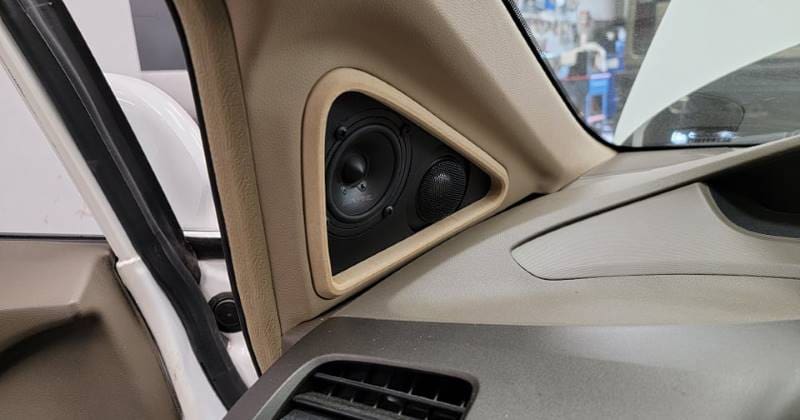
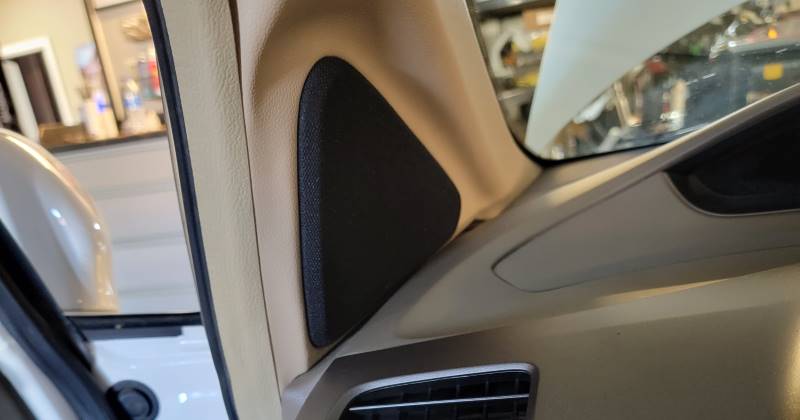
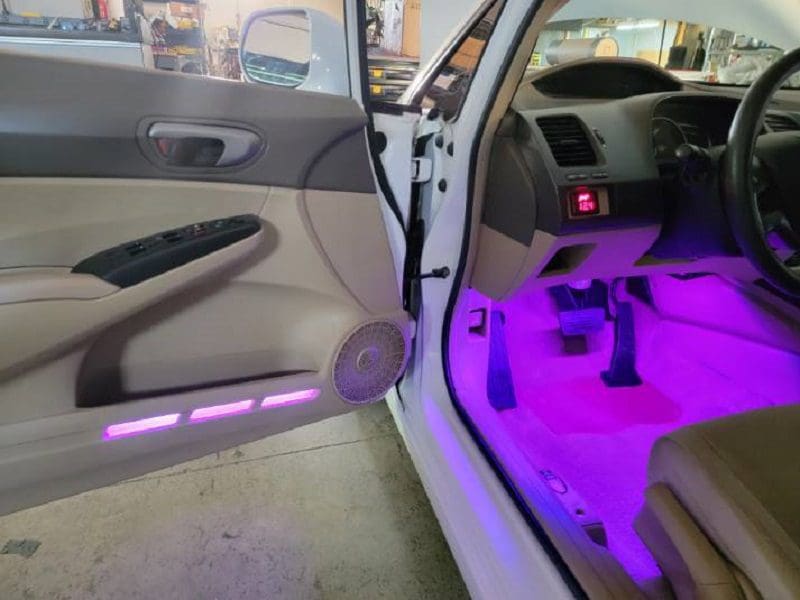
The all-important front stage speakers for the Civic consist of a set of Alpine Type-X S-X65C components that have been upgraded with a pair of matching Alpine 30MC 3-inch midrange drivers to create a three-way set. The midrange drivers and tweeters are molded into custom pods that fill the tiny front windows on either side of the dash. Grilles wrapped in black grille cloth conceal the speakers. The 6.5-inch woofers from the S-X65C set are mounted on a set of custom-made adapters in the stock door speaker location.
Fred cut translucent acrylic inserts for the windows in the stock door pocket and added RGB LED lighting so they’d glow any color Tim wanted. Additional RGB lighting above the passenger and driver footwells makes the interior pop!
For rear-fill speakers, Tim chose the Alpine X-S65 coaxial drivers. These speakers are mounted in the stock location on the rear parcel shelf.
Step Four: Source Unit and Digital Signal Processor
The heart of the audio system is a Kenwood DMX706S multimedia receiver that is mounted in the dash. Tim wants to upgrade it to a DNR1007XR once it’s available again. Four AIS cameras are integrated into the vehicle so that Tim can park and maneuver the car safely. The audio output of the Kenwood units runs to an eight-channel Rockford Fosgate 3sixty.3 digital signal processor that is installed under the passenger seat. The processor splits signals to a four-channel Rockford Fosgate T1000-4 for the midrange and high-frequency speakers and a T1500-1 for the subwoofers.
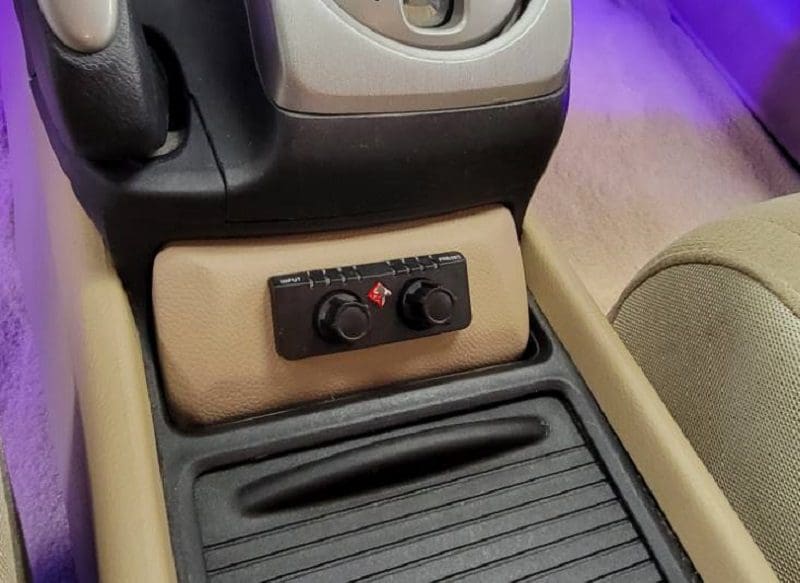
Installer Joseph Norton mounted the remote control for the processor in the center console on a custom-wrapped pod that resides just behind the shifter. While working on the interior, he mounted a Stinger voltmeter in the storage vent on the left side of the dash to let Tim monitor battery voltage and alternator performance.
Step Five: Custom Trunk, Amp Rack and Subwoofer Enclosure
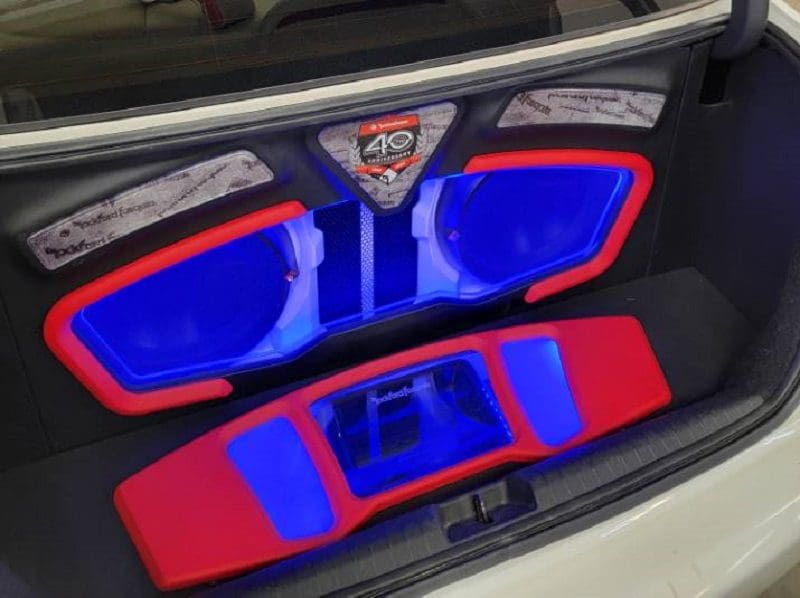
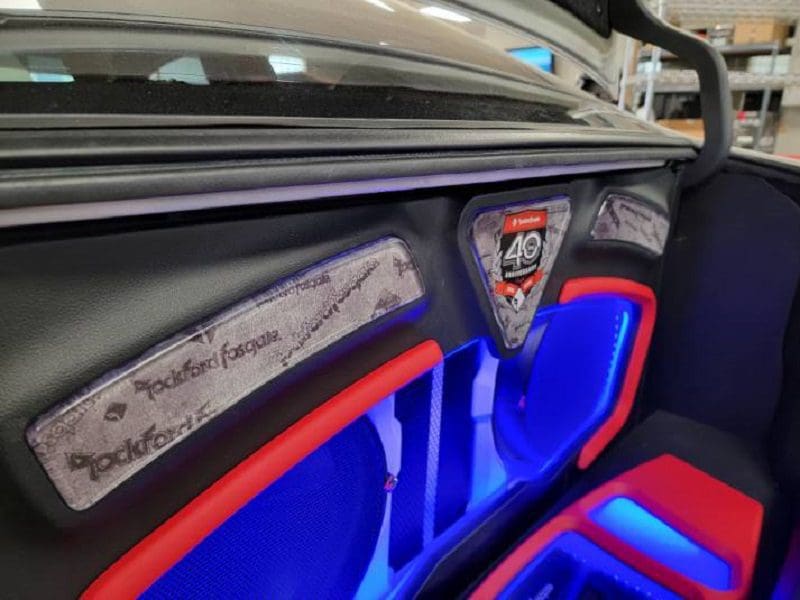
The trunk of the Civic would be the highlight of the installation. Fred constructed the elaborate enclosure while Joseph worked on the wiring and amp rack. The system has a pair of Rockford Fosgate T1D412 Power-Series 12-inch subs in a vented enclosure for bass. As you can see, the centrally located slot vents are trimmed in white vinyl-wrapped accent pieces. Additional RGB LED lighting surrounds the woofers.
The complex trim panel is wrapped in black vinyl with red accent pieces. In addition, there’s an acrylic trim piece around the subwoofer opening and three acrylic inserts above the subwoofer with custom Rockford Fosgate artwork and the 40th Anniversary logo in the center. The batteries, stiffening cap and fuses in the floor are concealed with a similar red vinyl-wrapped trim piece that includes hexagon mesh and frosted acrylic inserts.
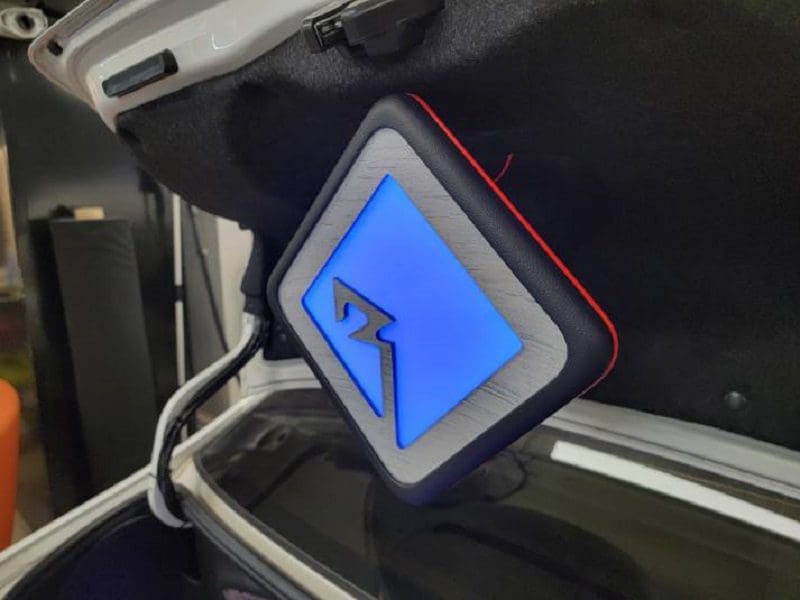
It’d be impossible to miss the large illuminated Diamond-R logo attached to the underside of the trunk lid. The combination of vinyl with red piping and the backlit acrylic Diamond-R logo help to show off Tim’s love of the Rockford Fosgate brand.
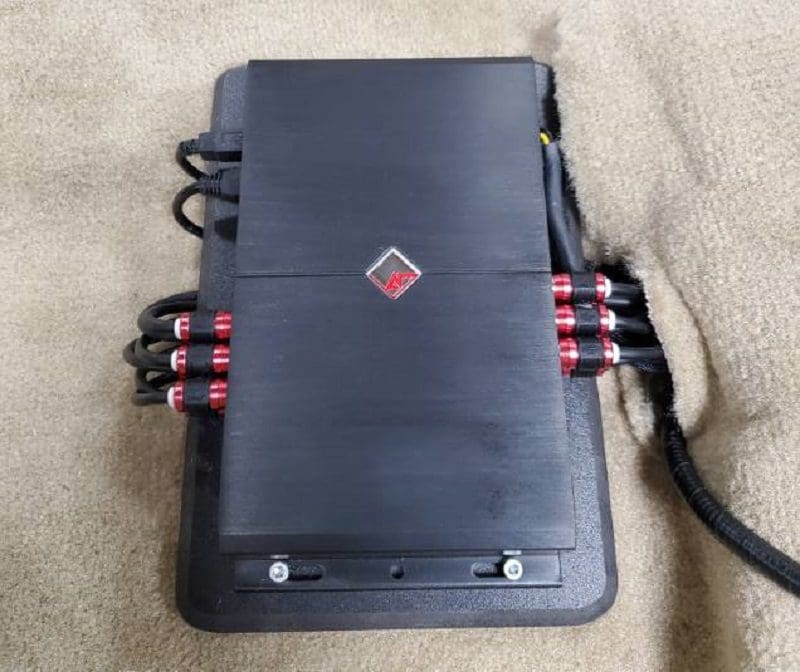
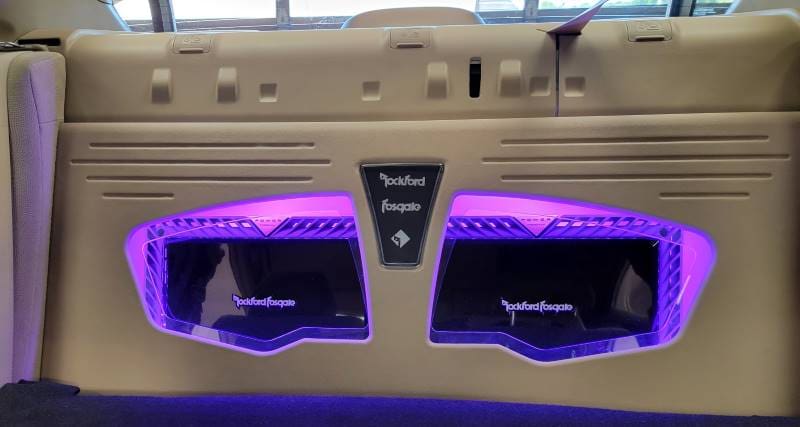
Folding the rear seats down reveals the amp rack. The Rockford Fosgate Power Series amplifiers are installed on a white vinyl-wrapped panel using spacers so that additional RGB LED lighting glows from underneath each unit. A custom trim panel wrapped in beige vinyl that matches the interior includes an acrylic trim piece that surrounds the opening around the amplifiers.
Step Six: Vehicle Upgrades
The Civic sits on a Skunk2 Racing adjustable coilover suspension kit that was adjusted for a perfect stance. The brakes have been upgraded with PowerStop pads and rotors, and the calipers have been painted red to add some flash behind the five-spoke Velsen V485 wheels. Rolling stock is a set of 215/45R17 Sport HP tires from Americus. We have to say, the entire exterior package looks clean and stylish without being over the top or gaudy.
The team here at BestCarAudio.com would like to thank The Audio Shop in Fayetteville, Arkansas, for sharing this classy project with our readers. Tim told us that he was excited to have chosen Joseph and Fred to create this masterpiece. He loves the detailed design of the audio and electrical system and is thrilled with the fabrication and the way it sounds. For more information on The Audio Shop, visit their website. In addition, you can see some of the behind-the-scenes images of this project and keep up with The Audio Shop’s latest creations by following them on their Facebook page and Instagram feed.
